12 Best Locations for Senior Portraits That Shine

12 Best Locations for Senior Portraits That Shine

A senior portrait should feel like more than a beautiful photo for an announcement card. It should hold a little of who you are right now: confident, curious, accomplished, and ready for what comes next. The best locations for senior portraits do not simply provide a pretty backdrop. They give your images atmosphere, movement, color, and a sense of place that still feels true to you.

For some seniors, that means tailored outfits against clean architectural lines. For others, it means tall grass catching the last light of day, a favorite neighborhood coffee shop, or a setting tied to years of practice and passion. A thoughtful location choice creates portraits that look polished without feeling overly posed.

Why Your Senior Portrait Location Matters

Location shapes nearly every visual detail in your final gallery. It affects the light on your skin, the colors around your wardrobe, how formal or relaxed the photographs feel, and even how naturally you move during your session. A soft garden can bring out a romantic, feminine look. A downtown setting feels editorial and modern. A simple studio allows the focus to stay entirely on expression, styling, and personality.

The most flattering choice is not always the most dramatic one. A popular mural may be fun, but it can compete with a patterned dress. A wide open field may look effortless, yet it is less ideal at midday when the sun is bright and shadows are strong. The right setting balances beauty with comfort and supports the story you want your portraits to tell.

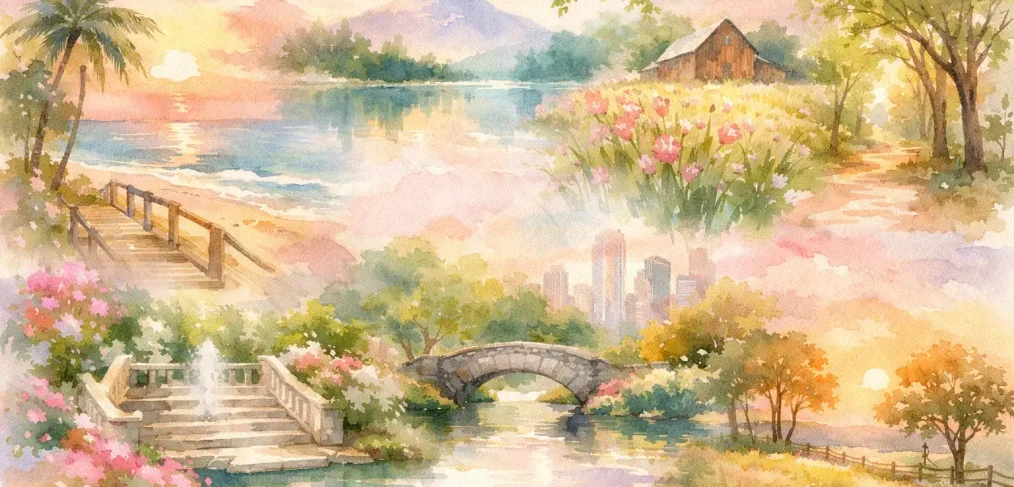
Best Locations for Senior Portraits in San Antonio

San Antonio offers an appealing mix of refined architecture, historic character, natural landscapes, and modern city energy. The key is choosing a location that complements your wardrobe and personal style rather than trying to include every possible backdrop in one session.

The Pearl District for a Modern, Editorial Feel

The Pearl District is a lovely choice for seniors who want portraits that feel elevated, current, and full of texture. Its brick walls, iron details, clean walkways, and stylish storefronts create variety within a small area. You can move from a tailored blazer and trousers to a dressier outfit without the setting feeling out of place.

This area works especially well for seniors interested in fashion, business, design, or city life. Keep accessories intentional and avoid outfits with too many competing prints. A clean color palette such as ivory, black, denim, soft blue, olive, or a rich jewel tone photographs beautifully against the warm urban textures.

Because public areas can be active, an early weekday session often provides a calmer experience. It is also wise to confirm any photography guidelines before planning around a specific business or private courtyard.

Downtown Architecture for Bold, Confident Portraits

Downtown San Antonio offers a sophisticated mix of stone facades, staircases, arches, tall windows, and graphic lines. It is an excellent setting for a senior who wants images with a stronger fashion-forward edge. Architectural backgrounds create natural leading lines and let a simple outfit make a confident statement.

Choose this option if you love clean composition and prefer a less traditionally outdoorsy look. A monochromatic outfit, structured jacket, polished boots, or a sleek midi dress can feel especially striking here. The trade-off is that downtown often requires more walking, parking coordination, and awareness of foot traffic. Comfortable shoes for moving between spots are always a smart idea, even if your portrait shoes are dressier.

Historic Missions for Timeless Texas Character

The Mission San José area and other historic settings offer warm stone, arches, pathways, and a quiet sense of permanence. These locations are especially beautiful for seniors who want a classic portrait with a subtle connection to San Antonio history. The natural textures photograph beautifully in both soft neutral clothing and richer autumn-inspired colors.

Respect for the space matters here. Historic sites can have visitor activity, restricted areas, and changing policies for photography. Rather than planning an elaborate setup, let the architecture and evening light do the work. A simple flowing dress, crisp button-down, or carefully chosen layered look will feel elegant and timeless.

Japanese Tea Garden for Lush, Romantic Color

For seniors drawn to gardens, stone paths, water features, and a softer portrait style, the Japanese Tea Garden creates a more romantic setting. The greenery and layered scenery bring dimension to portraits, especially during seasons when flowers and foliage are at their fullest.

This is a strong choice for someone who wants a feminine, graceful look or a wardrobe with soft pastels, florals, or flowing fabrics. It can also work beautifully with a more tailored outfit, as the contrast between refined clothing and organic surroundings feels intentional. Since garden locations may be busier on weekends, scheduling and patience are part of the experience.

A Sunlit Field or Nature Trail for Effortless Warmth

There is a reason golden-hour field portraits remain beloved. Open grass, delicate wildflowers, oak trees, and warm sunset light create images that feel relaxed and luminous. Nature-forward locations are ideal for seniors who feel most themselves outdoors, whether they are wearing a favorite pair of boots, a casual denim look, or a long dress that moves in the breeze.

The best results happen near sunrise or shortly before sunset, when the light is gentle and flattering. Fields can be seasonal, though. Summer may bring tall grasses and a warm glow, while winter often offers more muted tones and bare branches. Neither is wrong. It simply depends on whether you envision soft, earthy simplicity or fuller, greener color.

A Minimal Studio for a Fine-Art Finish

An indoor studio is one of the best locations for senior portraits when you want complete control over the final look. There is no weather concern, no crowded background, and no need to chase the last few minutes of daylight. With clean backdrops and intentional lighting, studio portraits can feel modern, editorial, and deeply personal.

This option is particularly lovely for seniors who want their face, style, and expression to remain the center of every image. It also gives you room to include a few meaningful details, such as a letter jacket, graduation cap, musical instrument, dance shoes, or an item connected to a favorite activity. The result can be simple, but never plain.

A Meaningful Personal Location for a Story Only You Can Tell

Sometimes the strongest setting is not a landmark at all. It may be the theater where you performed, a family ranch, a favorite bookstore, a horse barn, a flower shop, or a campus-inspired setting that reflects your next chapter. Personal locations bring emotional weight to a senior session because they connect the images to real memories.

These sessions require a little more planning. Permission may be needed, lighting may be less predictable, and the location should be visually uncluttered enough to photograph well. Still, when a place truly matters to you, those considerations are often worth it.

How to Choose the Right Setting for Your Style

Start with one simple question: how do you want to feel when you look back at these portraits years from now? If your answer is polished and poised, choose architecture or a studio. If you picture warm, carefree, and natural, look toward a field, park, or garden. If your ideal images feel sentimental and specific, consider a personal location.

Your wardrobe should guide the decision, too. A sequined dress may feel perfectly at home in an urban evening setting but less natural on a rugged trail. Soft dresses, linen, denim, and boots tend to suit nature beautifully. Classic black, cream, navy, and tailored pieces often shine in a studio or city location.

You do not need a dozen different backgrounds to create a varied gallery. One well-chosen location with a few nearby textures is usually more cohesive than rushing between several places. A professional photographer can help identify the light, angles, and quieter corners that make a familiar location feel fresh.

Plan for Light, Comfort, and Real Life

The most beautiful setting will not feel right if you are overheated, rushed, or worried about your shoes. Consider the season, the distance you will walk, and whether a location provides shade or a place to change outfits. Bring water, comfortable shoes, and a small bag for touch-up items.

If you are including props, keep them personal and purposeful. A bouquet, sports jersey, instrument, book, or college sweatshirt can add dimension without turning the session into a collection of accessories. The portrait should always remain about you.

Your senior year is a threshold moment, and these photographs deserve a setting that rises to meet it. Choose the place that lets you stand a little taller, smile a little easier, and see the beauty in the person you have become.
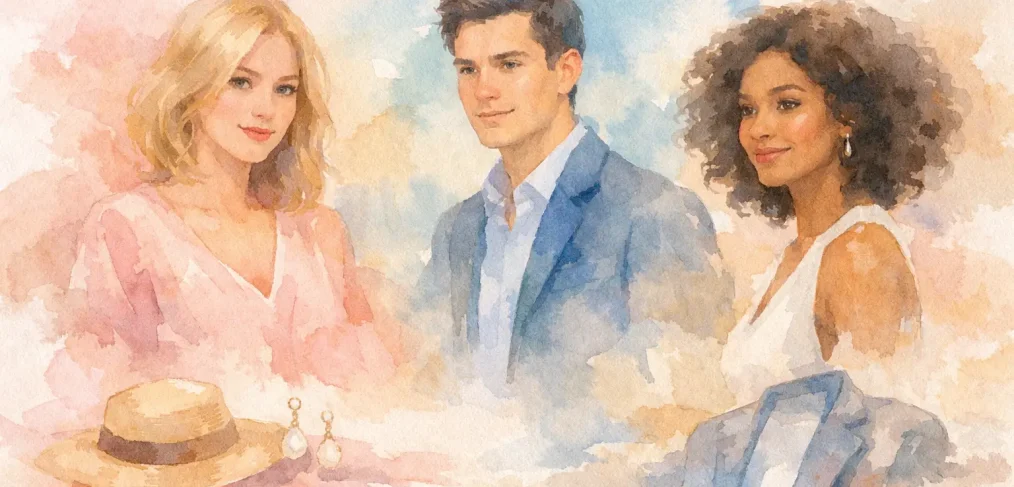
Professional Headshots in San Antonio: What to Wear

Professional Headshots in San Antonio: What to Wear

Your headshot is often seen before your handshake, your résumé, or the work you are proudest to share. It appears beside a LinkedIn profile, on an About page, in a speaker introduction, or in a client inquiry. The best professional headshots in San Antonio do more than show what you look like. They communicate that you are present, prepared, and ready to be trusted.

A polished portrait does not require becoming someone else for the camera. It asks for a little thoughtful preparation so your image reflects the version of you clients, colleagues, and opportunities should meet first. Whether you are refreshing a corporate profile, building a personal brand, returning to work after a career pause, or launching something of your own, a few intentional choices will make your final images feel current and distinctly yours.

Why Professional Headshots in San Antonio Deserve Intention

A quick phone photo can be useful for everyday life, but it rarely carries the clarity and confidence needed for a professional presence. Lighting can flatten your features, an awkward crop can feel impersonal, and a busy background can pull attention away from the person who matters most: you.

A professionally guided session creates space for details that are easy to overlook. The light is chosen to flatter. Your expression is adjusted in small, natural ways. Your pose is refined so your shoulders, posture, and face work together rather than competing for attention. The result should not feel overly posed or heavily edited. It should feel like you on a very good day.

For business owners and creative professionals, a headshot is also a brand asset. It can set the visual tone for your website, social media, marketing materials, and press features. If your work is warm and personal, your portrait can carry that same approachability. If your role calls for authority and precision, your wardrobe and expression can quietly reinforce it.

Choose Clothing That Keeps the Focus on You

The strongest headshot wardrobe is polished, comfortable, and free from distractions. Start with clothing that fits well at the shoulders and chest. A tailored blazer, structured blouse, refined knit, or simple dress can photograph beautifully because each creates clean lines without overwhelming your face.

Solid colors are usually the easiest choice. Rich neutrals such as cream, camel, navy, charcoal, olive, and soft black offer a timeless finish. Jewel tones can be equally striking when they complement your complexion. If you love color, consider a deep teal, burgundy, cobalt, or muted rose rather than a fluorescent shade that may reflect onto your skin.

Think About Necklines, Texture, and Layers

Necklines matter more than many people expect because they frame your face. A V-neck, scoop neck, collared shirt, or softly structured high neckline can all work well. The best choice depends on what makes you feel poised. If you tend to adjust a neckline throughout the day, it may not be the right one for your session.

Texture adds dimension in a close portrait. A knit, silk blouse, matte blazer, or subtle linen layer can create visual interest without appearing busy. Tiny patterns sometimes work, but large logos, high-contrast stripes, and bold prints often take attention away from your expression. The goal is not to wear the most memorable outfit in the room. It is to create an image people remember because of your presence.

Layers are especially useful when you want variety. A blazer or jacket can make one outfit feel more formal, then be removed for a softer, more relaxed look. If your session includes multiple looks, aim for contrast rather than bringing three nearly identical tops.

Match Your Headshot to Where It Will Be Seen

Before selecting an outfit, ask where the image will live. A headshot for a law firm, medical practice, or corporate team may call for a more classic, elevated look. A founder, designer, real estate professional, or consultant may want something that feels more personal while still looking refined.

This does not mean every corporate portrait needs a dark suit, or every personal-brand image needs trendy styling. It depends on your industry, your audience, and the message you want your photo to send. A financial advisor may choose a tailored blazer with a calm neutral backdrop. A wellness professional might prefer soft color, approachable styling, and brighter imagery. Both can be professional. They simply tell different stories.

Consider the visual identity of your existing materials, too. If your website is minimal and modern, a clean wardrobe and uncluttered setting will feel cohesive. If your brand is colorful and expressive, bring that energy in through one intentional detail, such as a signature color or elegant accessory.

Prepare Your Face, Hair, and Details the Week Before

The camera notices small details, but that does not mean perfection is required. The most flattering approach is to look well rested, comfortable, and like yourself. Schedule haircuts and color appointments several days before your session rather than the day before. This leaves time for a new cut or color to settle naturally.

Makeup should enhance rather than disguise. For some, that means a polished everyday look with a little extra definition around the eyes and lips. For others, professional makeup can offer peace of mind and a beautifully finished result. A matte or satin complexion generally photographs well, while a light hand with shimmer helps avoid unwanted shine under studio lighting.

If you wear glasses daily, wear them in your portraits. Your headshot should represent the person clients and colleagues will recognize. Clean the lenses before arriving, and if you have a second pair without a strong glare-reducing tint, bring both so you have options. Men may want to schedule grooming one or two days in advance to avoid fresh razor irritation.

Avoid experimenting with new skincare treatments, dramatic hair changes, or unfamiliar makeup right before your appointment. A headshot session is a celebration of your current professional season, not a reason to take a beauty risk.

Let Posing Be Guided, Not Forced

Many people arrive saying they are not photogenic. Usually, what they mean is that they have not been photographed with clear direction. You do not need to know where to put your hands, how far to turn your shoulders, or which smile looks most natural. That is part of a photographer’s work.

Small adjustments create meaningful changes. Turning slightly away from the camera can add shape. Relaxing your shoulders can make your posture feel open. Shifting your chin by a fraction can refine the angle of your face. During a guided session, these details are handled one at a time, leaving you free to focus on breathing, settling in, and connecting with the camera.

Expression matters just as much as posture. A direct smile may be right for a friendly service-based business. A softer, more thoughtful expression can work beautifully for an executive profile or editorial-style brand image. The strongest gallery usually includes both, giving you flexibility for different platforms.

Choose a Setting That Supports Your Brand

A minimal studio setting offers a clean, timeless result. With soft light and a simple background, the attention stays on your face and wardrobe. This is a particularly smart option for LinkedIn profiles, team pages, professional directories, and any brand that values a polished, consistent look.

An environmental setting can add personality when the location genuinely supports your work. A bright office, architecturally interesting space, or carefully selected outdoor location may feel right for a personal-brand session. The trade-off is that locations can introduce changing light, weather, visual clutter, and seasonal elements. A beautiful background is only helpful when it strengthens the image rather than competing with it.

For many professionals, a combination works well: one classic studio portrait for formal use, followed by a few more relaxed images for social media or a website. This approach creates a fuller visual library without sacrificing cohesion.

Arrive Ready to Feel Unhurried

Plan to arrive a few minutes early with your clothing on hangers, lint-free and ready to wear. Bring a small touch-up kit with powder, lip color, a comb or brush, and any accessories you are considering. If you are deciding between two outfits, bring both. Seeing them in the studio light is often more useful than making the decision at home.

Before the session begins, share how you will use the images and what you want people to feel when they see them. Confident. Welcoming. Sophisticated. Creative. Trustworthy. Those words give your photographer a meaningful direction for styling, posing, and expression.

A professional headshot is a simple investment with a long reach. Choose clothing that feels like your best self, allow room for expert guidance, and give yourself permission to be seen with confidence. The right portrait does not just fill a profile-photo space. It makes an introduction worth remembering.

How to Choose Headshot Outfits That Photograph Well

How to Choose Headshot Outfits That Photograph Well

A great headshot should feel like you on your best, most confident day. Learning how to choose headshot outfits is less about following a rigid fashion rulebook and more about selecting pieces that support your personality, profession, and the impression you want to make before you say a word.

Your clothing is part of the story your portrait tells. Whether you need a fresh LinkedIn photo, a polished image for your business, or an updated portrait that reflects a new season of life, the right outfit helps keep the focus where it belongs: on your expression, your presence, and your confidence.

Start With the Feeling You Want Your Headshot to Create

Before opening your closet or ordering something new, consider where your headshot will live. A corporate profile, a creative business website, and a personal brand all call for slightly different styling choices.

If you work in a traditional field, you may want to communicate competence and approachability through a tailored blouse, structured blazer, or simple dress. If your work is more creative, your outfit can hold a bit more personality through color, texture, or a distinctive accessory. The goal is not to dress like someone else in your industry. It is to look credible, current, and unmistakably like yourself.

Think about three words you want people to feel when they see your image. Perhaps they are warm, capable, and refined. Maybe they are bold, creative, and approachable. Let those words guide your choices. A headshot is a brand asset, but it should never feel like a costume.

How to Choose Headshot Outfits for Your Brand

The most flattering headshot outfit is usually one that offers a clear shape, a thoughtful color, and enough visual interest without competing with your face. Your photographer can help you refine the final selection, but arriving with a strong starting point makes the experience feel more relaxed.

Choose colors that complement your skin tone

Solid colors photograph beautifully because they create a calm, polished frame around your face. Rich neutrals such as cream, camel, navy, charcoal, chocolate, and soft black are timeless choices. Jewel tones like emerald, burgundy, deep teal, and sapphire can add presence while still feeling sophisticated.

For a softer, fine-art-inspired look, consider muted shades such as dusty blue, sage, blush, warm beige, or rosewood. These colors often feel graceful and elevated, especially when the rest of your wardrobe is minimal.

The best color is not always your favorite color on a hanger. Hold options near a window and notice what happens to your complexion. A flattering shade makes your skin look rested and your eyes look brighter. If a color makes shadows under your eyes more noticeable or washes you out, leave it behind for another occasion.

Favor simple patterns over busy prints

Patterns are not off limits, but they require more intention. Small, high-contrast prints, prominent logos, and tight stripes can distract from your expression or look overly busy in a cropped image. In many cases, solid colors are the safest and most versatile choice.

If you love print, choose something subtle and scaled appropriately for a close portrait. A gentle texture, tonal pattern, or delicate floral can be lovely, particularly for a more personal brand. The key is balance. Your clothing should add dimension, not demand all the attention.

Pay attention to the neckline

A neckline matters more in a headshot than many people expect because it appears so close to your face. V-necks, scoop necks, mock necks, collared shirts, and softly structured blouses can all photograph well. What works best depends on your personal style and the amount of coverage that helps you feel most comfortable.

Very low necklines can pull attention downward, while overly tight turtlenecks may feel restrictive unless they are a natural part of your style. A neckline with clean lines often creates the most polished result. If you are unsure, bring a few options to your session so you and your photographer can compare how each one frames your face.

Fit Matters More Than the Label

A beautiful color cannot compensate for clothing that feels awkward. Choose pieces that fit well through the shoulders, bust, and arms, since those areas are often most visible in a headshot. Clothing that is too loose can look shapeless on camera, while clothing that is too tight may create pulling or make it harder to move naturally.

You do not need a full new wardrobe for a professional portrait. Often, the best choice is a well-fitting piece you already own and feel wonderful wearing. Try it on before your session and move around in it. Sit, stand, lift your arms, and look at yourself from several angles. If you spend the entire time adjusting it, it is not the right headshot outfit.

Tailoring can make a meaningful difference, especially for blazers, button-down shirts, and dresses. A small adjustment at the waist or sleeve can turn a nice piece into one that looks intentionally selected for you.

Add Layers With Purpose

A blazer, cardigan, overshirt, or elegant jacket can bring structure and variety to your gallery. Layers are especially helpful if you want more than one look without changing completely. Start with a simple base layer, then add a blazer for a more executive feel or remove it for a softer, more relaxed portrait.

Choose layers that sit smoothly at the shoulders and do not bunch around the neckline. A tailored blazer is a classic choice, but it is not the only one. A beautifully draped jacket or a refined knit can feel equally polished when it fits your brand.

If you are planning multiple outfits, aim for contrast. You might bring one light neutral top and one richer color, or pair a structured professional look with a softer, more personal option. This gives you images that can work across your website, social profiles, speaking materials, and marketing pieces.

Keep Accessories Intentional

Accessories can add personality, but a headshot is not the place to wear every favorite piece at once. Small to medium earrings, a delicate necklace, or a meaningful ring can add a finished touch. Choose pieces that feel aligned with your daily style, especially if you want the image to stay relevant for several years.

Avoid jewelry that is highly reflective, noisy, or so large that it competes with your face. The same principle applies to watches, scarves, and statement collars. One intentional detail can be elegant. Several competing details can feel distracting in a close portrait.

Glasses deserve a little extra preparation. If you wear them every day, wear them in your headshot. They are part of how people recognize you. Clean the lenses carefully, and if possible, bring a pair with an anti-reflective coating to minimize glare.

Prepare the Details the Camera Will Notice

The day before your session, steam or press every outfit you plan to bring. Camera-ready clothing should be free of lint, pet hair, loose threads, and visible wrinkles. These small details may seem minor in person, but they can stand out in a high-resolution image.

Choose undergarments that work smoothly beneath your clothing and stay hidden when you move. For lighter tops, select a nude underlayer that matches your skin tone rather than bright white. If you are wearing a fitted piece, check for lines in a mirror before you leave home.

Hair and makeup should feel like an elevated version of your usual look. You want to recognize yourself, while still giving your features enough definition for the camera. A little extra polish around the eyes, brows, and complexion can help you look refreshed without feeling overdone.

Bring Options, Then Trust the Process

If you cannot decide between two or three strong choices, bring them. A professional headshot session is collaborative, and seeing colors and fabrics in the studio light can make the decision much easier. Include a few coordinating layers and accessories rather than arriving with a large, stressful suitcase of possibilities.

For clients in San Antonio, the light and setting can also influence what photographs best. A refined indoor portrait may welcome deeper colors and tailored layers, while an outdoor personal-brand session may call for softer tones and fabrics that move naturally. The right choice depends on the overall vision, not just the garment itself.

Most of all, choose something that lets you breathe, stand tall, and smile without hesitation. When you feel at ease in what you are wearing, it shows in every frame. Let your outfit support the woman and professional you already are, then give yourself permission to be seen.

Personal Branding Photography Trends for 2026

Personal Branding Photography Trends for 2026

A polished headshot still has a place, but it can no longer carry an entire professional presence on its own. The strongest personal branding photography trends are moving beyond the single, perfectly posed image and toward a fuller visual story: how you work, what you value, and the feeling people have when they encounter your brand.

For entrepreneurs, creatives, service providers, and professionals, this shift is good news. You do not need to perform a version of success that feels borrowed. You need imagery that is elevated, intentional, and unmistakably connected to the person behind the business.

Personal Branding Photography Trends Shaping 2026

The trend is not toward louder branding. It is toward greater clarity. Brands are choosing photographs that feel refined enough for a website or publication, yet warm enough to make a prospective client feel they have already met you.

This is especially meaningful for women building businesses alongside full lives. A founder may be a consultant, designer, real estate professional, therapist, artist, or coach. She may also be a mother, a partner, and the person her clients trust with a significant decision. Personal branding images can hold that dimension without turning a professional gallery into a family album.

The goal is thoughtful representation. A portrait should make your audience understand not only what you do, but why they would feel comfortable choosing you.

Editorial portraits are replacing stiff corporate poses

Clean, editorial-inspired portraiture is leading the way. Think purposeful styling, gentle direction, flattering light, and a composed expression that feels present rather than overly serious. The result is more polished than a casual phone photo and more approachable than a traditional corporate headshot.

This does not mean every image needs to look formal. It means the composition has intention. A simple studio backdrop, tailored outfit, beautiful chair, or carefully chosen window light can create a strong visual identity without competing with the subject.

For a professional who wants to communicate expertise, this approach offers a useful balance. You look prepared and credible, but still like yourself. For a creative or founder with a softer, more personal brand, it leaves room for warmth and personality.

Natural movement makes images feel alive

Perfectly still poses are giving way to subtle movement. Walking into a workspace, adjusting a sleeve, looking over notes, laughing between setups, or holding a cup of coffee can add ease to a gallery. These moments keep the images from feeling like a row of identical portraits.

Movement is not about creating artificial busyness. It works best when it supports your actual work and natural mannerisms. A designer might sort material samples. A wellness professional might prepare a welcoming space. A photographer might review an image on camera. Each action gives viewers a visual cue about the experience you provide.

The trade-off is that candid-looking images still require direction. Good movement photographs are planned with the same care as a classic portrait. The setting, light, clothing, and gesture need to work together so the image reads as relaxed rather than accidental.

A Brand Story Needs More Than One Setting

A single backdrop can create a beautifully focused headshot, especially when you need updated LinkedIn or speaker-profile imagery. But most businesses benefit from a gallery with visual range. Current personal branding photography trends favor a mix of close portraits, environmental images, detail shots, and a few moments of genuine interaction.

This gives you content with a longer useful life. One portrait may become a website introduction, while another supports a service page, newsletter, media feature, social post, or printed marketing piece. Instead of repeatedly cropping the same photo into new formats, you begin with images made for different needs.

A boutique studio session is ideal when your brand calls for a clean, timeless, fine-art look. A location-based session may be the better fit if your workspace, storefront, or the city around you is part of the story. In San Antonio, the answer may depend on your audience and brand palette. A light-filled studio can feel quietly luxurious, while an architectural or outdoor location can add energy and regional character.

Neither choice is inherently better. Consistency matters more than chasing a setting simply because it is popular.

Personal details, used with restraint

Clients want to know there is a real person behind a business. That has created more room for personal details in branding photographs: a favorite notebook, a meaningful piece of jewelry, an heirloom chair, flowers chosen in a signature color, or a glimpse of the routines that shape your work.

For some business owners, motherhood is an honest part of the brand story. A thoughtful image that reflects the life you are building can create a powerful connection, particularly if your audience shares those values. Still, personal does not have to mean private. You decide what belongs in the frame.

The most enduring approach is selective. Include details that reinforce your values, not props that merely fill space. If calm, care, craftsmanship, and connection define your business, your images should quietly reflect those qualities.

Color, Styling, and the Return to Timelessness

Bright trend colors and playful sets can be right for certain brands, but many professionals are moving toward a more enduring visual language. Soft neutrals, rich black, warm white, muted earth tones, and a controlled accent color photograph beautifully and remain useful across seasons.

The same is true for wardrobe. Rather than bringing a suitcase full of unrelated outfits, choose two or three looks that offer range while staying within one visual world. A structured blazer may communicate authority. A flowing dress or textured knit can soften the gallery. A simple, well-fitted top may become the most versatile option of all.

Your clothing should not need an explanation. When an outfit is right, it supports the message before a viewer has time to notice it.

Hair and makeup also play an increasingly strategic role. The strongest approach is not heavy transformation. It is camera-ready polish that respects your features and helps you feel confident. Skin should still look like skin. Texture, expression, and individuality are part of what makes a portrait memorable.

Images designed for real marketing use

A beautiful gallery is only valuable if you can use it. That is why thoughtful framing has become central to personal branding photography. Vertical images give room for website banners and social stories. Horizontal images can support headers, presentations, and editorial placements. A little negative space may be exactly what a designer needs for text placement.

Before a session, consider where your photographs will appear over the next six to twelve months. Are you launching a new service? Speaking at an event? Updating your website? Refreshing a professional profile? Selling a course, product, or mentorship? Your answers shape the session far more effectively than a generic inspiration board.

This practical planning does not make the imagery less beautiful. It gives beauty a purpose.

How to Choose Trends That Still Feel Like You

Not every personal branding photography trend deserves a place in your gallery. A trend should clarify your brand, not ask you to become someone else for the camera.

Begin with the impression you want to leave. Perhaps it is calm and capable. Perhaps it is joyful, luxurious, creative, grounded, or direct. Then consider the people you hope to serve. A high-end wedding planner, family-focused attorney, interior designer, and business mentor can all benefit from refined photography, but their visual cues should not be identical.

Bring that clarity to your photographer. Share your offers, ideal clients, brand colors, preferred uses for the images, and any concern you have about being photographed. A well-planned session creates space for both strategy and ease. You do not need to know how to pose. You only need to arrive ready to be guided.

At Veronika Gant Photography, the focus is on creating polished portraits that feel personal, flattering, and aligned with the season of life and business you are celebrating. Your brand deserves more than a quick update. It deserves imagery with enough care to grow with you.

Choose the trends that help your audience recognize your value, then let your photographs do what the best portraits always do: make a meaningful connection feel immediate.

How to Plan Graduation Portraits That Feel Timeless

How to Plan Graduation Portraits That Feel Timeless

A graduation cap is more than a finishing touch. It represents early mornings, late-night study sessions, proud parents, personal growth, and the moment you realize a long-awaited chapter is truly closing. Learning how to plan graduation portraits gives that milestone the attention it deserves, so your images feel elevated, personal, and just as meaningful years from now.

The most beautiful graduation portraits do not depend on a single perfect pose or a trendy location. They come together through thoughtful choices: a session date that gives you room to breathe, clothing that feels like you, and a few details that tell the story behind the diploma.

Start Planning Graduation Portraits Early

The best time to schedule graduation portraits is usually four to eight weeks before your ceremony. This gives you options for preferred dates, time to receive your gallery, and space to use your images for announcements, invitations, or a graduation display. Waiting until the final week can work, but it often means tighter schedules, rushed preparation, and less flexibility if weather changes your plans.

If you are graduating in spring, keep San Antonio’s warmer afternoons in mind. A sunrise session can feel quiet and fresh, while an evening session close to sunset offers soft, flattering light and a more relaxed pace. Your photographer can help you choose the right time based on the location, season, and style you envision.

Consider what you need the images for before selecting a date. If you want prints ready for a party, save-the-dates for a celebration, or a framed portrait as a gift for family, build in enough time for ordering. A portrait experience should feel celebratory, not like another deadline on an already full calendar.

Choose a Location With the Right Feeling

Your campus may be the most obvious choice, and for many graduates, it is exactly right. Photographing near a meaningful building, iconic walkway, stadium, chapel, or library brings the experience back to the place where the work happened. Campus portraits can feel especially personal when you choose spots connected to your daily life, not just the most recognizable sign.

Still, campus is not the only option. A clean studio setting creates polished, fine-art-inspired images with the focus entirely on you. A garden, downtown setting, or open outdoor space can offer a softer, more editorial look. The right location depends on whether you want your portraits to feel traditional, modern, romantic, professional, or a little of each.

Try not to choose a location simply because it is popular online. Ask yourself what you want to remember when you see these photos later. If your degree represents a new career direction, a refined studio portrait may serve beautifully for professional use. If the people and places around your college experience shaped you, campus may carry more emotional weight.

Plan Around Campus Crowds and Rules

Graduation season is busy. Popular campus landmarks may be full of other graduates, families, and photographers, particularly on weekends. A weekday morning or an earlier evening session can provide more breathing room.

Some campuses also require permits for professional photography or restrict access to certain areas. Confirm those details ahead of time rather than assuming every space will be available. A little planning protects the calm, unhurried feeling you want in your final images.

Build a Wardrobe That Photographs Beautifully

Your graduation regalia will be part of the session, but it should not be your only look. Consider bringing one outfit that feels polished and true to your personal style. A tailored dress, a sleek jumpsuit, a coordinated blouse and trousers, or a well-fitted suit can create variety while keeping the overall gallery sophisticated.

Solid colors and subtle textures tend to photograph beautifully because they keep the attention on your expression. Cream, white, black, soft blue, deep green, blush, and rich jewel tones are timeless options. If your school colors are meaningful to you, incorporate them thoughtfully through a dress, tie, shoes, jewelry, or bouquet rather than feeling obligated to wear them from head to toe.

Fit matters more than following every trend. Choose pieces you can move in comfortably, especially if you will be walking across campus, sitting on steps, or changing between looks. Steam or press clothing in advance, remove tags, and bring a hanger for your cap and gown. These small details make a noticeable difference.

Your shoes deserve attention, too. They may appear in walking images, full-length portraits, and cap-and-gown photos. Select a pair that complements your outfit and feels manageable for the location. If you love a dramatic heel but are shooting outdoors, bring a comfortable backup pair for walking between spots.

Make Your Graduation Portraits Personal

The cap, gown, diploma cover, and tassel are natural session staples. The images become more memorable, however, when you add a few items that reflect your path. Keep these details intentional rather than bringing a bag full of props.

A meaningful stole, honor cords, a class ring, flowers from someone special, a letter from a parent, or an item tied to your field of study can add depth to your gallery. A nursing graduate might include a stethoscope in a few frames. An artist may bring a portfolio or paintbrushes. A musician could incorporate an instrument. These details work best when they support the story without taking over the portrait.

If family has been a central part of your journey, invite them for a portion of the session. A few portraits with parents, grandparents, siblings, a partner, or children can become some of the most treasured images from the day. Plan this portion near the beginning or end of the session so everyone knows when to arrive and the focus remains relaxed.

Prepare for Photos You Will Love Seeing Close Up

Professional hair and makeup are not required, but they can be a worthwhile choice if you want a more refined finish or simply want to feel cared for before the session. The goal is not to look unlike yourself. Choose a look that feels like your best, most confident version: skin that looks like skin, makeup that photographs well, and hair that holds up in the weather.

A few days before your session, gather everything in one place: cap, gown, tassel, stole, cords, diploma cover, outfit, shoes, accessories, and touch-up essentials. Bring bobby pins, blotting papers, lip color, water, and a small towel if you are shooting during a warm season. Check that your cap sits securely before you leave home. It is much easier to adjust it calmly in advance than to troubleshoot it between images.

If you wear glasses, clean the lenses carefully. If you are considering a spray tan, haircut, or a new beauty treatment, schedule it early enough to make sure you feel comfortable with the result. Portrait day is not the moment to experiment with a look you have never worn before.

Leave Room for Real Emotion and Movement

You do not need to arrive knowing how to pose. A thoughtful photographer will guide you through relaxed, flattering movement and give you clear direction for your hands, posture, and expression. Your role is to be present enough to enjoy the experience.

Some of the strongest graduation portraits happen between the formal poses: adjusting your tassel, looking down at your diploma, walking in your gown, laughing after a cap toss, or pausing to take in the moment. These images feel natural because they are rooted in a real milestone, not forced perfection.

Cap tosses deserve a little preparation. Bring a second person if possible to help retrieve the cap, choose an open area away from trees and crowds, and be mindful of pins or hair accessories. It may take several tries, and that is part of the fun. Not every photograph needs to be perfectly composed to feel full of joy.

Think Beyond the Ceremony Day

Graduation portraits are not only for announcements. They can become a framed heirloom for your parents, a page in an album, a meaningful social media post, or a polished image for the next professional step. If you are entering the workforce, ask for a few clean, confident portraits without the cap and gown. Those images can be useful for a professional profile, personal website, or future opportunities.

When selecting favorites from your gallery, choose more than the obvious smiling portrait. Include one image that shows your full regalia, one close-up that captures your expression, one with a meaningful detail, and one with the people who helped you reach this moment. Together, those photographs preserve both the achievement and the love around it.

Your degree marks what you have completed, but your portraits can honor what comes next. Give yourself permission to celebrate it beautifully, stand a little taller, and let this milestone be seen.

Studio Maternity Photography vs Outdoor Photos

Studio Maternity Photography vs Outdoor Photos

The dress is chosen, your bump is beginning to feel beautifully real, and you want photographs that reflect this season with intention. When considering studio maternity photography vs outdoor, the best choice is not about which option is more beautiful. It is about which setting allows you to feel most comfortable, confident, and connected to the moment.

Both can create meaningful, polished portraits. A studio session offers controlled light and a refined editorial feel, while an outdoor session brings movement, natural texture, and a sense of place. Your personal style, pregnancy timeline, and the experience you want on session day all matter.

Studio Maternity Photography vs Outdoor: The Essential Difference

Studio maternity portraits are designed around simplicity. The focus stays on you: the shape of your pregnancy, your expression, the movement of a gown, and the quiet anticipation of meeting your baby. With clean backdrops, carefully shaped light, and an intentional wardrobe, studio imagery can feel modern, elevated, and timeless.

Outdoor maternity portraits place your story within the landscape. Golden light, open skies, trees, architecture, or a field in bloom can add softness and visual variety. These images often feel more relaxed and cinematic, especially for mothers who feel most at ease outside or who want a little movement woven into their gallery.

Neither setting is automatically more flattering or more meaningful. The right setting is the one that supports the version of motherhood you want to remember.

Why choose a studio maternity session?

A studio gives your photographer control over the elements that shape an image most: light, temperature, privacy, and styling. This is especially valuable when you want a fine-art look with luminous skin tones, clean composition, and no visual distractions competing for attention.

Comfort is another meaningful advantage. Pregnancy can make a warm afternoon, a long walk, or an uneven path feel much less appealing than it sounded while planning. In a studio, you can change outfits easily, take breaks, sit when needed, and move at a pace that feels good. You do not need to worry about wind lifting your hair, humidity affecting makeup, or curious passersby watching while you pose.

Studio sessions are also an elegant fit for a more fashion-inspired vision. Draped fabrics, bodysuits, fitted silhouettes, and flowing gowns photograph beautifully against minimal backgrounds. Because the setting is simplified, every detail feels purposeful. Your final images can live beautifully on a gallery wall for decades without being tied to a particular season or location.

What makes outdoor maternity photography special?

Outdoor portraiture has an ease that cannot be fully replicated indoors. The texture of a natural setting can make a session feel alive: sunlight through leaves, a soft breeze through your dress, a hand resting on your belly as you walk toward your partner. For families with older children, an outdoor location can also offer more room to move and play naturally.

If San Antonio is part of your family story, an outdoor session can capture the warmth and character of the area in a subtle, beautiful way. A carefully selected location may bring in soft greenery, natural stone, or open light without making the backdrop the main event.

Outdoor photographs do require flexibility. Light changes quickly, weather can shift, and many locations are at their best near sunrise or close to sunset. The resulting images can be extraordinary, but the experience is less controlled. If you love a little spontaneity and are comfortable adapting to the day, that is often part of the charm.

Consider Your Comfort Before Your Aesthetic

It is easy to choose a session setting based on a saved image online. Before committing, imagine the actual experience. Do you picture yourself barefoot in a flowing dress at sunset, or do you feel more drawn to a private space where you can settle in, change outfits, and let every detail be guided for you?

A studio is often ideal if you prefer privacy, have a more formal style, or are scheduling during the hotter months. It can also be the reassuring option if you are concerned about fatigue, swelling, weather, or simply want to avoid adding extra variables to your day.

An outdoor session may be the better fit if nature helps you relax, you want your partner or children to have space to move, or you are drawn to images that feel warm and unposed. A little wind, a walking pose, or a laugh between directions can become some of the most memorable frames in your gallery.

There is also room for a blend. Some mothers choose a studio session for polished solo portraits, then incorporate a brief outdoor portion for a different mood. This works best when timing, energy, and wardrobe allow it. More variety is lovely, but it should never come at the expense of feeling present and cared for.

Light, Weather, and Timing Matter More Than You Think

For maternity portraits, the ideal window is usually between 28 and 34 weeks. Your bump is often beautifully defined, while you may still feel more comfortable moving through poses. Of course, every pregnancy is different, so it is wise to plan around how you are feeling and any personal scheduling needs.

Studio sessions are wonderfully dependable at any time of day. Because the light is crafted rather than chased, your appointment can fit more easily around work, school pickup, or family routines. The weather outside does not affect the session, which can be a welcome relief during periods of intense heat or unpredictable rain.

Outdoor sessions are most flattering when the sun is low and soft. That usually means an early morning appointment or an evening session close to sunset. Summer sessions may begin later to avoid the strongest heat, while cooler months can offer more flexibility. Choosing outdoor photography means allowing the season to be part of the experience.

Wardrobe Can Help Decide the Direction

Your wardrobe does not have to determine the setting, but it can reveal what you are naturally drawn to. For a studio session, neutral fabrics, sculptural dresses, elegant bodysuits, and simple draping create a refined look. Soft ivory, cream, black, warm taupe, and muted earth tones tend to keep the imagery timeless.

For an outdoor session, consider how a dress moves in the breeze and photographs against the location. Flowing fabric, subtle color, and texture can feel beautiful in natural light. Avoid choosing a busy pattern just because it is technically outdoors. The goal is still to see you first.

Your photographer can help style the session so your wardrobe, setting, and final artwork feel connected. A curated approach makes a meaningful difference. When every element supports the same vision, your images feel less like separate photographs and more like a complete visual story.

Think About the Feeling You Want to Preserve

Ask yourself what you hope to feel when you look at these images years from now. Do you want to remember the calm strength of this chapter, with all attention centered on your changing body and inner anticipation? A studio may give you that quiet, intentional atmosphere.

Or do you want to remember the season around you: a warm evening, your family close by, a dress moving through open air, and the joyful expectation of what is next? An outdoor session can hold that sense of life in motion.

The most beautiful maternity portraits are not created by a backdrop alone. They happen when you feel seen, well prepared, and comfortable enough to be yourself. Choose the setting that gives you permission to slow down, embrace the beauty of motherhood, and let this fleeting season be photographed with the care it deserves.

Maternity Photos vs Family Photos: Which Fits?

Maternity Photos vs Family Photos: Which Fits?

A growing bump changes the rhythm of a family long before a baby arrives. There is anticipation, tenderness, and often a little chaos as everyone imagines what comes next. When deciding between maternity photos vs family photos, the best choice is not about which session is more valuable. It is about which story you most want to hold onto right now.

A maternity portrait session places your pregnancy at the center. A family session widens the frame, capturing the people who are already part of this chapter. Both can become meaningful artwork for your home, but they create a different feeling, require different preparation, and preserve a different kind of memory.

Maternity Photos vs Family Photos: The Main Difference

Maternity photography is an intentional celebration of motherhood. The focus is on your changing body, your connection to the baby you are waiting to meet, and the quiet strength of this season. A fine-art maternity portrait can feel polished and expressive, whether you choose a flowing gown, a minimalist studio look, or an outdoor setting with soft evening light.

Family photography is about connection in motion. It makes room for the hand-holding, giggles, shy smiles, bear hugs, and big-sibling personality that define your household today. Pregnancy may still be part of the story, but it is not the only focus. Your partner and children are equally present in the frame.

Neither approach needs to be formal or stiff. The distinction is simply where the visual emphasis falls. In maternity portraits, you are the heart of the image. In family portraits, the relationships around you lead the story.

Choose Maternity Photos When You Want to Honor Pregnancy

Pregnancy can feel long in the moment and remarkably brief once it has passed. A maternity session gives you space to pause before the next chapter begins. It is especially meaningful if this is your first pregnancy, if you have waited a long time for this season, or if you want imagery that reflects the beauty and power of motherhood with intention.

For many mothers, this is also a rare chance to be photographed without needing to manage everyone else’s experience. You can step into a carefully styled portrait session, wear something that makes you feel elevated, and let the camera focus on the details you may not see in everyday life: the curve of your bump, a hand resting gently on it, the calm expression that comes with knowing your life is about to change.

Maternity portraits are often best scheduled between 28 and 34 weeks, when the bump is beautifully defined but you are usually still comfortable enough to move with ease. Of course, timing depends on your pregnancy, your energy level, and whether you are expecting multiples. Booking earlier gives you more flexibility with dates, wardrobe planning, and the creative direction of your session.

A maternity session can include your partner or children without becoming a full family session. A few connected portraits with the people closest to you can add depth while keeping the central message clear: this is a portrait of you becoming, growing, and preparing.

The emotional value of a maternity session

The images may feel personal now, but they often become even more meaningful years later. Your child will be able to see themselves as part of your story before their arrival. You will remember not only how you looked, but how it felt to stand at the edge of a major life transition.

This kind of portraiture is not about performing pregnancy perfectly. It is about preserving a season that deserves to be seen with softness, confidence, and care.

Choose Family Photos When Connection Is the Priority

A family session is often the right choice when your children are at an especially memorable age, when your family has changed recently, or when you want an updated portrait that includes everyone. Little ones grow quickly, and their personalities shift just as fast. The toothy grin, the serious toddler stare, the way they wrap both arms around your neck – these are the details that become priceless.

If you are pregnant with older children at home, family photos can be a beautiful way to acknowledge that they are growing into a new role, too. Rather than asking them to understand the significance of a maternity portrait, you are inviting them into an experience centered on closeness and play. The result may include a few tender bump photos, but it will also celebrate the family you are already building together.

Family sessions tend to be more active and a little less predictable, especially with young children. That is not a drawback. It is often where the magic lives. A thoughtful photographer knows how to guide the session without expecting children to sit still or smile on command. Movement, cuddling, walking together, and small moments of play can create portraits that feel genuine rather than overly posed.

When a family session may serve you better

Choose family photos if your walls have not been updated in a while, if a child is approaching a milestone birthday, or if you want images that feel less centered on pregnancy and more centered on your shared life. This option is also ideal for families who want grandparents or extended relatives included for a legacy portrait.

The trade-off is that you may have fewer individual images focused solely on you and your pregnancy. With several people in the session, the photographer’s attention is naturally shared. If your deepest wish is to create artistic, motherhood-centered portraits, a dedicated maternity session will usually give you more of that experience.

You Do Not Always Have to Choose One

The most meaningful answer is sometimes both, especially if your budget and schedule allow it. A maternity session preserves the waiting season. A family session, planned later, documents the next version of your family when daily life has found its new rhythm.

If two separate sessions do not feel practical, consider a maternity session that includes a planned family portion. Begin with individual maternity portraits while everyone is fresh and your styling is exactly as you envisioned. Then invite your partner and children in for a smaller collection of connected images. This approach gives you a refined maternity gallery while honoring the people who are sharing the moment with you.

The key is to communicate what matters most before the session. Do you envision a statement image of yourself? Do you want your child’s excitement about becoming a big sibling to take center stage? Are you hoping for one framed portrait that represents your whole family? When your priorities are clear, the session can be designed around them.

Styling Each Session for a Timeless Look

Wardrobe shapes the final feeling of both maternity and family portraits. For maternity images, dresses with movement, soft texture, and a flattering silhouette photograph beautifully. Neutral tones, creamy whites, muted earth colors, and rich solid shades keep the focus on form and emotion. A carefully selected gown can bring a luxurious, editorial feel without making the images feel overdone.

For family portraits, aim for coordination rather than matching uniforms. Choose a palette of two to four complementary colors, then vary the textures and tones within it. Soft dresses, linen, knits, tailored basics, and simple layers photograph with depth. Avoid prominent logos, neon colors, and busy patterns that compete for attention.

Comfort matters, particularly for children. A beautiful outfit is only helpful if they can move, cuddle, and be themselves in it. Give everyone enough time to get ready, bring a simple comfort item if needed, and resist the pressure to make every detail perfect. The most enduring images are usually the ones that still feel like your family.

Consider the Setting and Season

Studio maternity photography offers a clean, modern setting where light, wardrobe, and posing can be carefully shaped. It is an excellent choice for mothers who want a polished, fine-art result without worrying about weather. Outdoor portraits offer a softer sense of place, with open skies, natural movement, and warm light that can feel especially lovely during a San Antonio evening.

Family sessions can thrive in either setting. A studio creates a refined, uncluttered look and keeps the focus entirely on your connection. Outdoors gives young children more room to explore and can create a relaxed, playful energy. The right setting depends on your aesthetic, your children’s ages, and whether you want the portraits to feel editorial, organic, or somewhere in between.

Let the Portraits Reflect This Exact Season

There is no wrong answer between maternity and family portraits. There is only the question of what you want to remember most vividly: the extraordinary transformation happening within you, the people gathered around you, or a thoughtful blend of both.

Choose the session that makes you feel seen. Years from now, the value will not be in whether every outfit was flawless or every child looked at the camera. It will be in having a beautiful, tangible reminder that this chapter mattered – and that your family was worthy of being celebrated while it was still unfolding.

How to Use Digital Backdrops for Fine Art Portraits

How to Use Digital Backdrops for Fine Art Portraits

A beautifully styled portrait should never feel limited by the four walls of a studio. Learning how to use digital backdrops gives photographers more creative range while preserving the polished, intentional look clients love. A soft floral room, a painterly garden, or a refined seasonal setting can become part of the final artwork without requiring an elaborate physical set for every session.

The key is not simply placing a subject onto a new background. It is creating an image where the light, wardrobe, pose, perspective, and finishing all belong together. When those details are considered from the beginning, digital backdrops can support a fine-art vision rather than distract from it.

Start With the Portrait, Not the Backdrop

A digital backdrop is most convincing when it complements the person in front of the camera. Before choosing a scene, consider the feeling you want the finished portrait to hold. A maternity portrait may call for delicate florals, airy architecture, or a softly textured neutral space. A child’s milestone portrait may feel more at home in a whimsical garden or a simple editorial setting with room for personality to shine.

Avoid choosing a backdrop just because it is dramatic or detailed. The subject should remain the focus. If the scenery competes with a child’s expression, an elegant gown, or the quiet connection between a mother and her little one, it is doing too much.

Look closely at the backdrop’s color palette and direction of light before the session begins. A warm, sunlit scene will be difficult to pair with cool studio lighting. Likewise, a backdrop photographed from eye level will not naturally suit a portrait made from a much higher or lower camera angle. A little planning prevents hours of difficult editing later.

How to Use Digital Backdrops With Realistic Light

Light is what makes or breaks a composite. You do not need an overly complicated lighting setup, but you do need to match the essential qualities of the selected backdrop: direction, softness, height, and color.

If the backdrop has window light falling from camera left, place your key light on camera left. Notice whether the light is soft and wrapping or more defined with a noticeable shadow edge. For a light, airy studio scene, a large softbox or diffused window light often creates a flattering match. For an editorial image with deeper shadows, you may need more controlled and directional light.

Pay attention to where shadows land. A subject lit from the right and placed into a backdrop with left-facing shadows will immediately look cut out, even if the masking is technically clean. When possible, use a simple floor mark so your subject remains positioned consistently in relation to your light source.

Color temperature matters, too. If the backdrop carries warm cream tones and golden highlights, set your lighting and white balance with that warmth in mind. You can refine color in editing, but it is far easier to begin with an exposure and white balance that are already close to the intended final image.

Keep the Background Light Simple

A plain, neutral backdrop in the studio is usually the best starting point. White, light gray, or a soft midtone can work well, depending on the subject’s wardrobe and hair color. The goal is clean separation around the edges, particularly around curls, tulle, sheer fabric, and flowing dresses.

Give your subject some distance from the physical background. This reduces unwanted shadows behind them and makes edge selection easier during post-production. If you want a grounded look in the final scene, photograph the subject standing or sitting on a surface that allows you to preserve natural contact points at the feet, hemline, hands, or props.

Choose Wardrobe and Props That Belong in the Scene

The most successful digital backdrop portraits are styled as complete visual stories. Wardrobe should feel believable within the environment, not like an afterthought added to a stock scene.

For a muted, painterly backdrop, soft ivory, dusty rose, sage, beige, and warm neutrals often photograph beautifully. For a more dramatic studio-inspired scene, rich jewel tones, structured silhouettes, and classic black can offer a stronger editorial presence. Texture also matters. Linen, tulle, knitwear, and flowing fabrics add dimension that feels natural in fine-art imagery.

Props should be used with restraint. A simple chair, a small stool, flowers, or a favorite heirloom piece can create a sense of connection and scale. But every physical prop must make sense in the final background. If the backdrop shows a garden path, a bulky studio bench may feel out of place. If it suggests an elegant interior, a simple chair with an appropriate perspective may be enough.

For photographers working with young children, this planning is especially valuable. Children rarely perform on cue, and that is part of their charm. Set up the lighting and framing before they step onto the set, then guide them through a few natural movements. A candid glance, a twirl, or a curious little pause can become the image that feels most alive.

Photograph for a Clean Composite

A strong composite begins with a well-captured original file. Shoot in RAW so you have flexibility with exposure, color, and detail. Use a focal length that resembles the backdrop’s perspective. Wide-angle images tend to show more environmental distortion, while portraits made with a longer lens have a flatter, more compressed look.

Match your camera height to the backdrop. If the backdrop’s horizon line sits around the subject’s waist, photographing from a very low angle may create an unnatural mismatch. When you preview the backdrop before the session, identify its horizon line, vanishing points, and the general height from which it appears to have been photographed.

Leave enough room around the subject for cropping and placement. A close-up may be beautiful, but it gives you fewer options if the selected backdrop needs more space above the head or around the dress. At the same time, do not place the subject so far away that fine hair detail becomes difficult to retain.

Take a few variations of each pose. Photograph standing, seated, and closer portrait crops if the wardrobe and backdrop allow. This gives you options when a particular pose fits the scene more naturally than another.

Edit With Restraint and Intention

Once the subject is selected and placed into the digital backdrop, begin with the big details before chasing tiny imperfections. Match exposure first, then white balance and contrast. If the background is softer and more muted than the portrait, reduce clarity or sharpness slightly on the subject rather than over-sharpening the environment.

Create believable contact shadows where the subject meets the floor, chair, or other object. These shadows do not need to be dark or obvious. They simply need to suggest weight and connection. Without them, even a beautiful composite can look as though the subject is floating.

Next, refine the edges. Hair, sheer garments, and delicate fabrics need patience. Avoid harsh cutout lines or overly smooth masking. A small amount of natural softness often looks more realistic than a perfectly crisp edge against a softly blurred background.

Finish the portrait with a consistent color grade. Fine-art imagery often benefits from gentle tonal adjustments, softened greens, creamy highlights, or a subtle film-inspired finish. The goal is cohesion. The client should experience one finished image, not a portrait layered over a separate scene.

Know When a Digital Backdrop Is the Right Choice

Digital backdrops are ideal when you want to offer variety without building an entirely new set for each concept. They can make seasonal work more efficient, expand your creative portfolio, and help deliver a refined look in a smaller studio space. They are also useful when weather, location access, or timing would make an outdoor vision impractical.

That said, they are not the right choice for every photograph. A family image with lots of movement, overlapping hands, or several energetic children may be easier to create in a physical environment. Highly reflective surfaces, complex transparent materials, and detailed interaction with the ground can also require more editing time than the final image warrants.

The best approach is thoughtful, not automatic. Use digital backdrops when they elevate the story and support the experience you want to create. With careful lighting, intentional styling, and a gentle hand in editing, a simple studio portrait can become a piece of art that feels personal, polished, and worthy of being displayed for years.

A Personal Branding Session Example With Purpose

A Personal Branding Session Example With Purpose

Your business is already telling a story before anyone reads a caption or books a call. The question is whether your images reflect the care, confidence, and personality behind your work. This personal branding session example shows how a thoughtfully planned portrait experience can create more than a new headshot. It can give your website, social media, marketing materials, and client communications a polished visual language that feels distinctly yours.

For many women in business, being photographed can feel more personal than creating a logo or choosing a color palette. You are the face clients trust. A strong branding session makes space for that reality, combining elevated portraits with images that show how you work, what you value, and the experience you create.

A Personal Branding Session Example for a Service-Based Founder

Imagine a San Antonio wellness coach preparing to launch a refreshed website and a new six-week program. She is warm, organized, and deeply knowledgeable, but her existing photos are a mix of cropped phone snapshots, a dated corporate headshot, and a few images where the lighting does not match her brand.

Her goal is not to look like someone else. She wants prospective clients to see a calm expert who is approachable, intentional, and prepared to guide them. That clarity becomes the foundation for every choice made before the camera comes out.

The session begins with a planning conversation. Rather than asking only, “What do you want to wear?” a photographer should ask what the client wants people to feel when they land on her website. Is her brand soft and nurturing, editorial and refined, energetic and bold, or clean and minimal? Who is she speaking to? Where will the photographs live? A sales page needs different images than a LinkedIn profile, and an Instagram launch needs more variety than a single speaker bio.

For this coach, the visual direction is modern, light-filled, and quietly luxurious. Her palette includes cream, warm beige, muted green, and a small touch of gold. She brings a laptop, a favorite notebook, a ceramic mug, a few program worksheets, and a simple bouquet. These are not random props. They create context without distracting from her face or making the images feel overly staged.

The First Look: The Confident Introduction

The first outfit is a tailored cream suit with a silk camisole. This look is designed for the website homepage, media features, speaking opportunities, and profile images. The styling is polished, but not overly formal. Her hair is softly styled, makeup is fresh and camera-ready, and the jewelry is understated.

The opening portraits focus on connection. Some images show her looking directly into the lens with an easy expression. Others are slightly more relaxed, with her seated near a clean wall or standing beside a window. A few frames are composed with open space around her so a web designer can place text beside the image later.

This is an often-overlooked detail. Beautiful photos are useful, but brand photos become more valuable when they are composed for the places where your business actually needs them. A close head-and-shoulders portrait is ideal for a bio. A vertical image may work well for stories and reels covers. A horizontal frame with negative space can support a website banner or a workshop announcement.

The Second Look: The Work Behind the Brand

For the next portion, she changes into a soft knit top and tailored trousers. The setting shifts to a desk with her laptop, notebook, and program materials. These photographs are not meant to suggest that she spends every workday in a perfectly styled studio. They simply offer a refined glimpse into her process.

She reviews notes, writes in her planner, responds to an email, and looks over a client worksheet. The photographer guides her hands, posture, and angles so the images feel natural while remaining flattering. Small adjustments matter: a relaxed shoulder, hands placed with purpose, a turned chin, or a pause between movements can transform a stiff image into one that feels effortless.

This part of the session produces the images that often work hardest behind the scenes. They can be used in email headers, launch graphics, educational posts, sales pages, and captions about the care that goes into client support. They also help a service-based business feel tangible. A future client may not fully understand your process yet, but she can see that you are thoughtful, prepared, and present.

The Third Look: Personality and Connection

Personal branding should not become so polished that it loses the person. For the final look, the coach wears a flowing midi dress in a muted olive tone. The setting is softer and more relaxed, perhaps near a textured wall, a bright corner of the studio, or an outdoor location selected for clean light and an uncluttered backdrop.

Here, the images are more expressive. She laughs, walks, holds her coffee, and settles into a few seated poses. These photographs may not be the ones she uses for a formal media kit, but they are essential for building familiarity on social media. They remind her audience that there is a real person behind the expertise.

The trade-off is worth considering. If your brand serves a highly corporate audience, you may need more structured portraits and fewer lifestyle frames. If your work is built around trust, education, creativity, or personal transformation, those relaxed images can be especially powerful. The right balance depends on your audience, not on a one-size-fits-all shot list.

What Makes This Branding Session Example Effective

The strength of this session is not the suit, the notebook, or the backdrop on their own. It is the connection between the client’s business goals and the photographs she receives. Every detail supports a message: she is capable, warm, organized, and ready to serve.

A purposeful session also gives her range. Instead of posting the same headshot repeatedly, she has a collection of images for different moments in her marketing. She can introduce herself with a classic portrait, share a behind-the-scenes post using a desk image, promote a workshop with a horizontal frame, or pair a thoughtful caption with a more candid lifestyle photograph.

That variety helps a brand look established without feeling manufactured. It also makes content planning easier. When your visuals have already been created with your offers and platforms in mind, you are less likely to scramble for a photo every time you need to announce something meaningful.

How to Prepare for Your Own Personal Branding Session

Preparation does not mean arriving with every pose memorized. It means bringing enough clarity that your images can support your next season of business. Start by considering what you are promoting in the next three to six months. A new website, service launch, speaking event, course, or rebrand may shape the images you need.

Choose two or three outfits that feel like an elevated version of what you already wear when you want to feel your best. Solid colors, intentional layers, and well-fitted pieces typically photograph beautifully. Avoid clothing that pulls, wrinkles easily, or makes you feel unlike yourself. Confidence is visible, and comfort supports it.

Bring items that belong naturally in your work. A photographer may bring a camera, a designer may bring a sketchbook, and a coach may bring her workbook or laptop. The best props are personal to your process and visually simple. Too many items can turn a portrait session into a product display.

It also helps to make a short list of where you need photos. Think beyond Instagram. You may need a website banner, professional headshot, email welcome sequence, podcast bio, printed guide, press feature, or event announcement. Sharing these needs before the session allows the experience to be styled around real use rather than guesswork.

Let Your Images Match the Level of Your Work

A personal brand is built through consistency, but it should never feel rigid. You can be professional and warm. You can be polished and approachable. You can create images that honor your expertise while still leaving room for your personality to come through.

At Veronika Gant Photography, a personal branding session is designed with that balance in mind: refined portraits, thoughtful direction, and imagery that feels beautiful because it feels true to you. When you are ready to be more visible, begin with photographs that make stepping into that visibility feel natural.

When Should Babies Do a Cake Smash Session?

When Should Babies Do a Cake Smash Session?

The tiny hand reaches for frosting, the serious first taste becomes a delighted grin, and suddenly your baby is covered in buttercream. Parents often ask when should babies do cake smash photos, and the answer is usually close to their first birthday – but the calendar is only part of the story. The best session date is one that honors your child’s personality, comfort, and developmental stage while giving you the polished, joy-filled portraits you will treasure long after the last crumb is swept away.

The Best Age for a Cake Smash

Most babies enjoy a cake smash session between 10 and 12 months old. This window works beautifully because many little ones can sit steadily on their own, show curiosity around new textures, and respond with big, expressive reactions. They are still wonderfully baby-like, yet their personality is becoming impossible to miss.

Scheduling a session before the actual first birthday also has a practical advantage: you can display your images at the birthday party, use them for an invitation, or share them with loved ones as part of the celebration. If you would like finished artwork in hand before the big day, plan your portrait date several weeks ahead to allow time for selecting images and preparing your final pieces.

That said, there is no single age that fits every child. A 9-month-old who sits confidently and is eager to explore may be ready. A 13- or 14-month-old can also have a beautiful session, especially if the first birthday season passed in a blur of travel, illness, or a busy family schedule. The goal is not to meet a rigid deadline. It is to capture this fleeting stage with intention.

When Should Babies Do a Cake Smash Based on Readiness?

Your baby does not need to walk, talk, or understand the occasion to enjoy cake smash portraits. Sitting independently is the most useful milestone. It allows for flattering, safe posing and lets your child engage with the cake without needing constant support just outside the frame.

Temperament matters, too. Some babies greet anything new with immediate enthusiasm. Others need time to observe, touch, and decide whether the frosting is worth it. Both responses can create lovely images. A thoughtful, cautious baby may offer the sweetest wide-eyed expressions, while an energetic little one may turn the experience into a full celebration.

If your child is especially wary of unfamiliar people or settings, consider scheduling the session at a time of day when they are typically rested and content. Avoid booking directly over a usual nap or meal time simply because it is convenient for the adults. A well-rested baby is far more likely to enjoy the experience, and that ease shows in every photograph.

There is also no requirement that your baby demolish the entire cake. Some babies delicately poke one finger into the icing. Some prefer to taste only a few bites. Others would rather clap, smile, and investigate the cake stand. A successful session is not measured by the mess. It is measured by genuine expression and images that feel like your child.

Why Earlier Than the Birthday Often Works Best

For families planning a first birthday party, a cake smash about three to six weeks before the celebration is often ideal. This gives you breathing room rather than turning a meaningful portrait experience into another rushed task on the party checklist.

An earlier date also leaves space for real life. Babies sometimes wake up congested, skip a nap, or enter a brief phase of separation anxiety. Booking ahead means there is more flexibility if the original date needs to move. It also gives you time to coordinate a favorite outfit, choose a refined color palette, and decide how you would like to display the portraits in your home.

For a more classic, heirloom feel, many parents choose a simple studio setting with a carefully styled cake and minimal details. A clean backdrop keeps the focus exactly where it belongs: on your baby’s bright eyes, soft curls, tiny toes, and growing personality. Bolder themes can be delightful, but they tend to date more quickly. The right choice depends on whether you want the images to feel playful, editorial, traditional, or a blend of all three.

Plan Around Your Baby’s Schedule, Not the Clock

Morning is often the sweet spot for a cake smash session. Many babies are happiest after a full night of sleep, breakfast, and a little time to settle into the day. For others, the ideal window may be after the first nap. Your photographer can help guide timing, but you know your child’s rhythms best.

Try to keep the hours before the session calm. A relaxed morning at home is usually better than stacking errands, appointments, and a long car ride before portraits. Bring familiar comfort items if your child has one, but keep them tucked away until needed so the set remains visually clean.

It is wise to offer a small, familiar meal beforehand rather than arriving with a very hungry baby. Hunger can lead to frustration before the cake appears, while a completely full child may have no interest in tasting anything new. A light meal creates the best middle ground: comfortable, curious, and ready to explore.

Cake Choices, Allergies, and What to Expect

Your cake should be simple enough for little hands to break apart and soft enough for easy tasting. A small, single-tier cake with buttercream frosting photographs beautifully and is usually easier for babies to handle than fondant-covered designs. The frosting creates texture, color, and those irresistible messy fingers without becoming overly hard or sticky.

Before choosing ingredients, think through your baby’s experience with common allergens. If eggs, dairy, wheat, or food coloring are new to your child, it is usually better not to introduce them for the first time during a photo session. Choose a cake made with ingredients your baby has already tolerated, and communicate any dietary needs in advance.

Bring water, wipes, a towel, and a complete change of clothes for both baby and the adult most likely to hold them afterward. Frosting has a remarkable ability to travel. If you are planning a bath or splash finale, have a clean diaper, pajamas, and a warm layer ready for the ride home.

A brief warm-up before the cake is placed in front of your baby can make all the difference. Portraits in a favorite outfit, cuddles with a parent, and a few playful moments give your little one time to feel secure in the space. By the time the cake arrives, the session feels less like a new demand and more like a fun surprise.

What If Your Baby Does Not Like Cake?

This happens more often than parents expect, and it is never a failure. Some babies dislike the texture of frosting. Others are more interested in the cake topper, the plate, or the sound of their own hands on the floor. A skilled cake smash experience leaves room for these moments instead of forcing a performance.

If your child seems hesitant, patience is more helpful than pressure. Let them look. Let them touch a small bit of frosting on a parent’s finger. Let them take a break for a cuddle. Often, the most heartfelt photographs happen in these in-between moments, when a parent reassures a child and their connection takes center stage.

You can also consider a different celebratory element if cake truly is not your child’s preference. Fresh fruit, pancakes, or another familiar treat can be a thoughtful alternative when planned safely. The celebration is about marking one year of growth, love, and becoming – not about insisting on a particular dessert.

Make the Milestone Feel Like Your Family

A cake smash is more than a trendy first birthday photo. It is a small pause in a year that moves astonishingly fast. Your baby will not remember the frosting or the backdrop, but you will remember the way they studied the cake, laughed at the mess, or reached back for you with a sticky hand.

When you choose a date based on your baby’s readiness rather than a rule, the experience becomes easier and the portraits become more honest. For San Antonio families who want a refined, joyful way to celebrate that first year, a thoughtfully planned cake smash session turns one ordinary afternoon of sweetness into artwork with a place in your family’s story.